
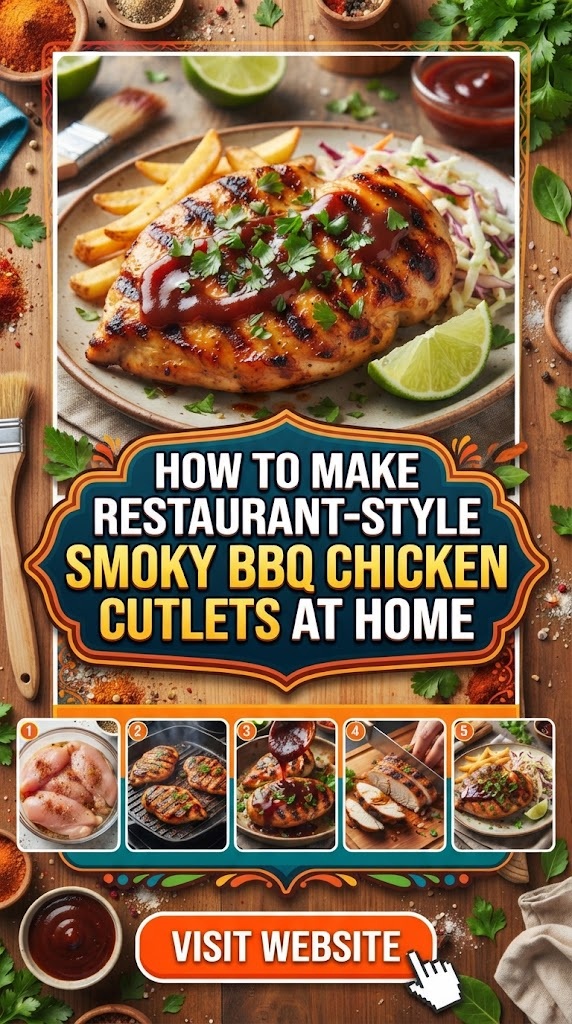

There is something undeniably magnetic about a perfectly cooked chicken cutlet. When done right, it offers a symphony of textures: a shatteringly crisp exterior that gives way to a tender, juicy interior. But when you elevate that classic cutlet with the deep, complex notes of a smoky BBQ glaze, you move from a simple weeknight meal to a culinary masterpiece that rivals the best smokehouses and bistros in the country.
Achieving that “restaurant-quality” finish at home often feels elusive. Home cooks frequently struggle with breading that falls off, chicken that dries out, or a BBQ flavor that feels one-dimensional. This comprehensive guide is designed to dismantle those challenges. We will explore the science of the perfect cutlet, the art of the smoky infusion, and the step-by-step techniques required to bring professional-grade BBQ chicken cutlets to your kitchen table.
The Anatomy of the Perfect Chicken Cutlet
Before we light the stove, we must understand what makes a cutlet “restaurant-style.” In professional kitchens, consistency is king. Every piece of chicken is treated with precision to ensure it cooks at the same rate and maintains its moisture.
1. The Cut and the Prep
The foundation of a great cutlet is the chicken breast. However, a whole chicken breast is uneven; the thick “head” takes much longer to cook than the thin “tail.” To fix this, you must master the butterfly and the pound.
- Butterflying: Placing your hand flat on top of the breast and slicing it horizontally into two thinner pieces.
- Pounding: Using a meat mallet (or a heavy skillet) to pound the chicken to a uniform thickness—usually about ¼ to ½ inch. This breaks down muscle fibers, ensuring the meat is tender and cooks in minutes, preventing the exterior from burning before the interior is safe to eat.
2. The Brine: The Secret to Juiciness
Have you ever wondered why restaurant chicken is so much juicier than home-cooked versions? The secret is often a brine. Even a quick 30-minute “dry brine” with salt can transform the protein structure. Salt draws moisture out, dissolves into a brine, and is then reabsorbed into the meat, seasoning it deeply and helping the proteins retain water during the high-heat cooking process.
Mastering the Smoky BBQ Flavor Profile
“BBQ” is a broad term, but “Smoky BBQ” suggests a specific profile: a balance of sweetness, acidity, heat, and that quintessential wood-fired essence.
Building the Smoke Without a Smoker
Since most cutlets are pan-fried or baked, you won’t have the benefit of an 8-hour wood-fire smoke. We have to “cheat” the flavor using high-quality ingredients:
- Smoked Paprika (Pimentón): This is your best friend. Unlike standard paprika, this is dried over oak fires, providing an instant smoky backbone to your rub.
- Liquid Smoke: Use this sparingly. A single drop in your BBQ sauce or egg wash can mimic the flavor of hickory or mesquite.
- Chipotle Peppers in Adobo: These are smoked jalapeños. Using the sauce from the can adds both heat and a deep, earthy smokiness.
- Smoked Salts: Finishing your cutlets with a sprinkle of Yakima applewood smoked salt can elevate the dish significantly.
The BBQ Sauce Hierarchy
To get that restaurant glaze, you need a sauce with high sugar content (for caramelization) and enough acidity to cut through the fat of the breading.
- Kansas City Style: Thick, sweet, and tomato-based. Best for that classic “sticky” cutlet.
- South Carolina Style: Mustard-based. Adds a tangy zip that pairs beautifully with fried breading.
- Texas Style: Peppery and thinner, focusing more on the meat’s natural flavor.
Ingredients You Will Need
To make approximately 4-6 large cutlets, gather the following:
The Protein:
- 3 large boneless, skinless chicken breasts (halved and pounded).
The Dredge (The 3-Station Method):
- Station 1 (Flour): 1 cup all-purpose flour, 1 tsp smoked paprika, 1 tsp garlic powder.
- Station 2 (Egg Wash): 2 large eggs, 2 tbsp BBQ sauce, 1 tsp hot sauce.
- Station 3 (Breading): 2 cups Panko breadcrumbs (for maximum crunch), ¼ cup grated Parmesan (for umami), 1 tbsp dried parsley.
The Smoky BBQ Glaze:
- 1 cup of your favorite BBQ sauce.
- 1 tsp liquid smoke (hickory or mesquite).
- 1 tbsp apple cider vinegar (for tang).
- 1 tbsp honey or brown sugar (for extra tackiness).
Cooking Fat:
- Neutral oil with a high smoke point (Grapeseed, Avocado, or Canola oil). Avoid butter for the initial fry as it burns too quickly.
Step-by-Step Instructions: The Professional Method
Step 1: Preparation and Pounding
Start by trimming any excess fat or sinew from the chicken breasts. Slice them horizontally. Place the pieces between two sheets of plastic wrap or in a heavy-duty gallon bag. Using the flat side of a meat mallet, gently but firmly pound the chicken from the center outward. Aim for an even thickness across the entire piece. Season both sides with salt and black pepper and let them rest for at least 15 minutes.
Step 2: Setting Up the Dredging Station
In professional kitchens, this is called the “Standard Breading Procedure.”
- Flour: The flour dries the surface of the meat so the egg can stick.
- Egg: The “glue.” By adding a bit of BBQ sauce to the egg wash, you begin layering the flavor before the meat even hits the pan.
- Breadcrumbs: Panko is superior to traditional breadcrumbs because the flakes are larger and airier, creating more surface area for crisping.
Step 3: The Coating Technique
Use the “dry hand, wet hand” method to avoid “club hand” (where your fingers become breaded).
- Use your left hand to coat the chicken in flour. Shake off the excess.
- Drop it into the egg wash. Use your right hand to flip it and ensure it’s fully coated.
- Lift it out, let the excess drip off, and drop it into the Panko.
- Use your left hand to scoop breadcrumbs over the top and press down firmly. Pressing is key—it ensures the breading doesn’t flake off during frying.
Step 4: The Perfect Fry
Heat about ¼ inch of oil in a large skillet (cast iron is best for heat retention) over medium-high heat. You’ll know the oil is ready when a pinch of breadcrumbs sizzles immediately upon contact.
Place 2 cutlets in the pan at a time. Do not overcrowd the pan. Overcrowding drops the oil temperature, leading to greasy, soggy breading. Fry for 3-4 minutes per side until golden brown and the internal temperature reaches 165°F (74°C).
Step 5: The “Smoky” Glaze Application
This is where the magic happens. Many people make the mistake of simmering the chicken in sauce. This ruins the crunch. Instead, use the “Flash Glaze” technique:
- Once the chicken is fried, remove it to a wire rack (not paper towels, which steam the bottom).
- In a small saucepan, warm your smoky BBQ glaze mixture.
- Using a pastry brush, generously paint the warm sauce over the hot, crispy chicken.
- Optionally, place the glazed cutlets under a broiler for 60 seconds to “set” the sauce until it bubbles and starts to char slightly at the edges.
Variations: Baking and Air-Frying
If you are looking for a lighter version without sacrificing the smoky BBQ experience, these two methods are excellent alternatives.
The Oven-Baked Method
Preheat your oven to 425°F (218°C). The trick to crispy baked cutlets is toasting the breadcrumbs first.
- Sauté your Panko in a pan with a little oil until it’s light golden before you bread the chicken.
- Place the breaded chicken on a wire rack set over a baking sheet. This allows hot air to circulate under the chicken, preventing a soggy bottom.
- Bake for 15-18 minutes. Glaze during the last 3 minutes of cooking.
The Air-Fryer Method
Air fryers are essentially high-powered convection ovens.
- Preheat the air fryer to 390°F.
- Lightly spray the breaded cutlets with oil.
- Cook for 6 minutes, flip, spray again, and cook for another 5-6 minutes.
- Glaze and air fry for an additional 1 minute to caramelize the sauce.
Elevating the Dish: Homemade Smoky BBQ Sauce Recipe
While store-bought sauce is convenient, making your own allows you to control the “smoke” levels and the sugar content.
Ingredients:
- 2 cups Ketchup
- ½ cup Apple Cider Vinegar
- ¼ cup Brown Sugar
- 2 tbsp Molasses (adds deep color and earthy sweetness)
- 1 tbsp Worcestershire Sauce
- 1 tbsp Smoked Paprika
- 1 tsp Garlic Powder
- 1 tsp Onion Powder
- ½ tsp Cayenne Pepper (optional for heat)
- 1 tsp Hickory Liquid Smoke
Instructions: Combine all ingredients in a saucepan over medium heat. Bring to a simmer, then reduce heat to low. Let it thicken for 15-20 minutes, stirring occasionally. This sauce can be stored in the fridge for up to two weeks and is far superior to most bottled options.
Best Sides to Pair with BBQ Chicken Cutlets
To truly recreate the restaurant experience, the sides must be as well-thought-out as the main protein.
1. Creamy Apple and Cabbage Slaw
The acidity and crunch of a good slaw cut through the richness of the fried chicken and the sweetness of the BBQ sauce.
- Pro Tip: Add thin slices of Granny Smith apple for a tart, crisp contrast.
2. Smoked Gouda Mac and Cheese
Double down on the smoky theme. Using smoked Gouda or smoked Cheddar in your cheese sauce creates a cohesive flavor profile across the entire plate.
3. Charred Corn on the Cob
Either grill the corn or char it in a dry cast-iron skillet. Top with lime juice, chili powder, and a bit of cotija cheese for an elote-style twist that pairs perfectly with BBQ.
4. Sweet Potato Fries with Maple Aioli
The natural sweetness of sweet potatoes complements the molasses and brown sugar notes in the BBQ sauce.
The Science of Crunch: Why Texture Matters
The “Restaurant Style” label implies a specific mouthfeel. Scientists and chefs refer to this as the “contrast of textures.” In a smoky BBQ cutlet, you have:
- The Glaze: Viscous and sticky.
- The Breading: Brittle and airy.
- The Meat: Soft and fibrous.
If the breading becomes soggy, the experience is ruined. To prevent this, always ensure your meat is dry before the flour stage. If there is moisture on the chicken, it will create steam under the breading during frying, causing the crust to pull away from the meat (the dreaded “breading gap”).
Troubleshooting Common Issues
“The breading is falling off my chicken.”
- The Fix: You likely didn’t shake off the excess flour, or you didn’t let the breaded chicken “set.” After breading, let the cutlets sit on a plate for 5-10 minutes before frying. This allows the flour and egg to hydrate and form a stronger bond.
“The chicken is burnt on the outside but raw inside.”
- The Fix: Your oil is too hot, or your cutlets are too thick. Ensure you pound the chicken to a uniform thickness and keep your oil around 350°F (175°C). Use an instant-read thermometer to check the oil temperature.
“The BBQ sauce is burning in the pan.”
- The Fix: Do not put BBQ sauce on the chicken before frying. The sugar in the sauce will burn at temperatures much lower than what is required to fry the chicken. Always apply the sauce after the chicken is cooked.
How to Reheat and Store Leftovers
If you have leftovers, the goal is to maintain the crunch.
- Never use the microwave. It will turn the breading into a gummy mess.
- The Oven: Reheat at 375°F on a wire rack for about 8-10 minutes.
- The Air Fryer: This is the best method for leftovers. 3-4 minutes at 350°F will bring back nearly all the original crispness.
Dietary Substitutions
- Gluten-Free: Replace all-purpose flour with almond flour or a 1:1 GF blend. Use crushed pork rinds or GF Panko for the breading. Ensure your BBQ sauce is labeled gluten-free (some use barley-based thickeners).
- Keto/Low Carb: Use the pork rind breading method and a sugar-free BBQ sauce (sweetened with monk fruit or erythritol). Bake or air fry instead of deep frying.
- Dairy-Free: The standard recipe is nearly dairy-free; simply omit the Parmesan cheese in the breading or replace it with nutritional yeast for a similar nutty flavor.
The Cultural Significance of the BBQ Cutlet
While the “Cutlet” (or Schnitzel, Milanese, or Katsu) is found in almost every culture, the “Smoky BBQ” version is a uniquely American evolution. It marries the European technique of pan-frying breaded meat with the indigenous and Southern traditions of slow-smoking and sauce-crafting.
In the Southern United States, BBQ is more than a flavor; it’s a social ritual. By applying these flavors to a cutlet—a preparation method often associated with quick urban dining—you create a “fusion” dish that is both nostalgic and modern. It’s “soul food” meet “bistro fare.”
Frequently Asked Questions (FAQs)
What is the best oil for frying chicken cutlets?
The best oils are those with high smoke points and neutral flavors. Grapeseed oil is a favorite among chefs for its clean taste. Peanut oil is another excellent choice if allergies aren’t a concern, as it adds a very subtle richness.
Can I use chicken thighs instead of breasts?
Yes! Chicken thighs are more forgiving and stay juicy longer. However, they are harder to pound into a uniform “cutlet” shape. You may need to trim them more extensively and cook them slightly longer (thighs are best at an internal temperature of 175°F).
How do I make my BBQ sauce even smokier?
Aside from liquid smoke and smoked paprika, you can try “smoking” your salt or even adding a tiny bit of ground cumin, which provides an earthy, “charred” aroma that mimics the smell of a grill.
Why use Panko instead of regular breadcrumbs?
Traditional breadcrumbs are fine-textured and absorb more oil, which can lead to a heavier, greasier crust. Panko is made from crustless bread that is processed into large, airy flakes. It doesn’t absorb as much oil and stays crispy for much longer.
How long can I marinate the chicken in BBQ sauce?
Avoid marinating the chicken in the sauce if you plan to bread it. The acidity in the sauce can “cook” the surface of the meat (like ceviche), making it tough, and the moisture will make breading difficult. If you want deep flavor, use a dry rub under the breading instead.
Summary Checklist for Success
- Uniform Thickness: Pound the chicken to ½ inch.
- Season Early: Salt the meat 15 minutes before breading.
- Dry-Wet-Dry: Follow the flour-egg-crumb sequence strictly.
- Heat Management: Keep oil at 350°F; don’t crowd the pan.
- The Wire Rack: Never rest fried food on flat surfaces; let it breathe.
- Glaze at the End: Apply the smoky BBQ sauce to hot chicken and flash-broil for the best result.
By following this guide, you are no longer just making dinner; you are mastering a technique. The smoky BBQ chicken cutlet is a versatile, crowd-pleasing dish that demonstrates how simple ingredients—when treated with professional care—can create an extraordinary dining experience. Whether it’s for a Sunday family dinner or a meal-prep staple, these cutlets bring the heart of the American smokehouse right into your home kitchen.