
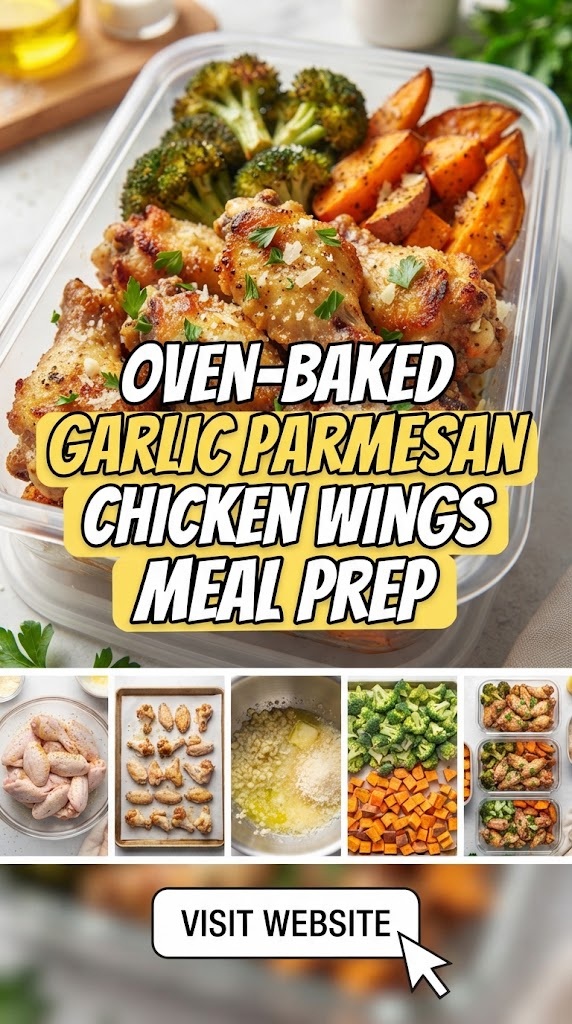

There is a certain magic that happens when the pungent, savory aroma of roasting garlic meets the nutty, salty crust of aged Parmesan cheese. While Buffalo wings often steal the spotlight at sports bars and tailgates, the Garlic Parmesan wing is the sophisticated, flavor-packed cousin that deserves a permanent spot in your culinary rotation.
But why limit this indulgence to game days? By mastering the art of Oven-Baked Garlic Parmesan Chicken Wings, you can transform a classic “cheat meal” into a high-protein, keto-friendly, and remarkably convenient meal prep staple. This guide will walk you through every nuance of creating restaurant-quality wings at home—achieving that elusive crunch without a deep fryer—and how to structure your week around this delicious protein.
Why Garlic Parmesan Wings are the King of Meal Prep
Meal prepping often gets a bad reputation for being repetitive or bland. Chicken breasts and steamed broccoli can only take you so far. This is where wings come in.
- High Protein, Low Carb: For those following a ketogenic or low-carb lifestyle, wings are a natural fit. By baking them instead of breading and frying, you eliminate unnecessary fillers.
- Flavor Longevity: Unlike some proteins that dry out when reheated, chicken wings (especially those with a higher fat content in the skin) retain their moisture and flavor profile exceptionally well.
- Portion Control: Wings are modular. You can easily count your macros by tracking the number of wings per container, making it simple to hit your daily targets.
- Versatility: Garlic Parmesan is a “neutral-savory” profile. It pairs just as well with a side of roasted zucchini as it does with a fresh Caesar salad or even a small portion of sweet potato fries.
The Science of the Crunch: How to Avoid Soggy Wings
The biggest challenge with oven-baked wings is achieving a crispy skin. In a deep fryer, the intense heat dehydrates the skin almost instantly. In an oven, moisture often gets trapped, leading to rubbery skin. To combat this, we use two secret weapons: The Wire Rack and Baking Powder.
The Baking Powder Trick
This isn’t just folklore; it’s chemistry. Adding a small amount of aluminum-free baking powder to your dry rub raises the pH level of the chicken skin. This allows the proteins to break down more efficiently, resulting in a skin that browns faster and becomes significantly crispier.
Note: Ensure you use baking powder, NOT baking soda. Baking soda will leave a metallic, unpleasant taste.
The Importance of Airflow
Never bake wings directly on a flat baking sheet. The side touching the metal will sit in its own rendered fat and become soggy. By placing a wire cooling rack inside your baking sheet, you allow hot air to circulate 360 degrees around the wing, mimicking the environment of a convection oven or air fryer.
Ingredients: Quality Matters
To reach the 5-star level of flavor, you cannot cut corners with your ingredients.
1. The Chicken
Look for “party wings” which are already split into drums and flats (wingettes). If you buy whole wings, you’ll need to butcher them yourself by removing the tips and separating the joint. Organic or air-chilled chicken is preferred as it contains less water weight, leading to a better sear.
2. The Parmesan
Avoid the “shaker” cheese found in the pasta aisle. For meal prep that tastes gourmet, use freshly grated Parmigiano-Reggiano or a high-quality domestic Parmesan. The pre-shredded bags contain anti-caking agents (like cellulose) that prevent the cheese from melting smoothly into the sauce.
3. The Garlic
We use a dual-approach:
- Garlic Powder: For the initial dry rub to infuse the meat.
- Fresh Minced Garlic: For the butter sauce to provide that sharp, aromatic punch.
4. The Fat
Unsalted grass-fed butter is the gold standard here. It carries the garlic flavor and helps the Parmesan adhere to the wings.
Step-by-Step Recipe: Oven-Baked Garlic Parmesan Wings
Prep time: 15 minutes
Cook time: 45-55 minutes
Yields: 4-5 Meal Prep Servings
Ingredients List:
- 4 lbs Chicken Wings (Drums and Flats)
- 2 tbsp Aluminum-free Baking Powder
- 1 tsp Sea Salt
- 1 tsp Black Pepper
- 1 tsp Onion Powder
- 1 tsp Smoked Paprika (for a hint of color)
For the Garlic Parm Sauce:
- 1/2 cup Unsalted Butter, melted
- 6 cloves Garlic, finely minced
- 1/2 cup Freshly Grated Parmesan Cheese
- 1/4 cup Fresh Parsley, chopped
- 1/2 tsp Crushed Red Pepper Flakes (optional)
Instructions:
1. The Drying Phase (Crucial Step)
Pat your wings dry with paper towels. I mean really dry. Any surface moisture will turn into steam in the oven, which is the enemy of crispiness. If you have time, place the uncovered wings in the fridge for 2 hours before seasoning to air-dry the skin further.
2. The Coating
In a large bowl, toss the wings with the baking powder, salt, pepper, onion powder, and smoked paprika. Ensure every wing is lightly and evenly coated.
3. The Setup
Preheat your oven to 425°F (220°C). Line a large baking sheet with aluminum foil (for easy cleanup) and place a wire rack on top. Arrange the wings in a single layer, ensuring they aren’t touching.
4. The Bake
Bake for 45 to 55 minutes. Halfway through (around the 25-minute mark), flip the wings using tongs. They are done when the skin is golden brown, bubbly, and sounds “hard” when tapped with a fork.
5. The Sauce Toss
While the wings are finishing, whisk together the melted butter, minced garlic, grated Parmesan, and parsley in a large bowl. Once the wings come out of the oven, let them rest for 2 minutes, then toss them into the sauce bowl. Use a spatula to ensure every nook and cranny is coated in cheesy, garlicky goodness.
Meal Prep Strategies: Storage and Reheating
If you are prepping these for the work week, how you store them determines whether you’ll have a soggy mess or a delicious lunch.
Storage Tips
- Cooling: Let the wings cool completely before sealing the lid on your containers. If you seal them while hot, condensation will form, ruining the crispy skin.
- Container Choice: Glass containers are superior for wings. They don’t retain odors and can handle the high heat of a toaster oven or air fryer during reheating.
- Sauce Separation: If you prefer maximum crispiness, you can store the wings dry and keep the Garlic Parmesan sauce in a small separate 2-oz container. Simply toss them after reheating.
The Best Reheating Methods
- The Air Fryer (Highly Recommended): 3-5 minutes at 375°F. This will bring the wings back to their original glory.
- The Toaster Oven: 5-8 minutes at 400°F.
- The Oven: 10 minutes at 400°F.
- The Microwave: Avoid if possible. It will make the skin rubbery. If you must use a microwave, heat in 30-second intervals and accept that the texture will be soft.
Perfect Side Dishes for Your Meal Prep
To turn these wings into a balanced meal, you need sides that complement the richness of the butter and cheese.
1. The Low-Carb Route
- Roasted Broccoli with Lemon: The acidity of the lemon cuts through the fat of the wings.
- Cauliflower Mash: A keto-friendly alternative to potatoes that soaks up any extra garlic butter.
- Celery and Carrots: The classic wing accompaniment. Prep these in sticks and keep them in a separate compartment with a side of Greek yogurt-based ranch.
2. The Filling Route
- Garlic Herb Rice: A simple basmati rice tossed with parsley and a little olive oil.
- Roasted Sweet Potato Wedges: The sweetness of the potatoes pairs beautifully with the saltiness of the Parmesan.
3. The Fresh Route
- Zesty Kale Slaw: A vinegar-based slaw provides a crunch and a brightness that refreshes the palate between wings.
Nutritional Breakdown (Per Serving)
Assuming 8-10 wings per serving
- Calories: 580 kcal
- Protein: 42g
- Fat: 44g
- Carbohydrates: 2g
- Fiber: 0g
- Sugar: 0g
This macro profile is ideal for those on a Keto or Carnivore-adjacent diet. It provides high satiety due to the protein and fat content, making it less likely that you’ll reach for snacks later in the day.
Expert Tips for the Best Results
Use a Meat Thermometer
While 45-55 minutes is a standard window, chicken wings are forgiving because of their dark meat and bone content. However, for maximum juiciness, you’re looking for an internal temperature of 165°F (74°C). Some prefer taking wings to 185°F, as the collagen breaks down further at higher temps, making them “fall-off-the-bone” tender while the skin crisps.
Infuse the Butter
For an extra layer of flavor, sauté the minced garlic in the butter over low heat for 2-3 minutes before tossing. This “mellows” the raw garlic bite and infuses the butter with a deep, roasted aroma.
The “Double Crisp” Method
If you have an air fryer and are meal prepping, under-bake the wings by about 5 minutes in the oven. Then, when you go to eat your lunch during the week, “finish” them in the air fryer. This ensures they aren’t overcooked but are incredibly crunchy at the moment of consumption.
Flavor Variations to Keep Things Interesting
If you meal prep Garlic Parmesan wings every week, you might eventually want a change. Here are some quick pivots using the same base:
- Spicy Garlic Parm: Add 1 tablespoon of Buffalo sauce or Sriracha to the butter mixture.
- Lemon Pepper Garlic Parm: Add the zest of one lemon and an extra teaspoon of cracked black pepper.
- Truffle Garlic Parm: Swap one tablespoon of regular butter for truffle butter or add a few drops of truffle oil at the end.
- Pesto Garlic Parm: Mix a tablespoon of basil pesto into your garlic butter for a herbaceous, green twist.
Frequently Asked Questions
Can I use frozen wings?
Yes, but you must thaw them completely and dry them thoroughly. Frozen wings often have a “glaze” of ice that will release a lot of water. If you don’t dry them, they will boil in the oven rather than roast.
Is baking powder safe?
Yes, baking powder is a common leavening agent. Just ensure it is aluminum-free to avoid any metallic aftertaste.
How long do these last in the fridge?
When stored in an airtight container, cooked chicken wings stay fresh and safe to eat for 3 to 4 days.
Can I freeze these after cooking?
Absolutely. You can freeze the cooked wings (without the sauce is best) for up to 2 months. Reheat directly from frozen in an air fryer or oven until hot and crispy, then toss in fresh sauce.
Planning Your Meal Prep Sunday
To make this process as efficient as possible, follow this workflow:
- Morning: Pat wings dry and leave them in the fridge on a rack.
- Afternoon: Preheat oven. Toss wings in dry rub.
- Baking: While wings are in the oven, chop your vegetables (celery, carrots) and prepare your side dishes.
- Saucing: Prepare the garlic butter in the last 5 minutes of baking.
- Assembly: Once wings are tossed, portion out your containers. Add your cold sides (veggies/dip) to separate compartments or small bags to keep them crisp.
Final Thoughts
Oven-Baked Garlic Parmesan Chicken Wings represent the pinnacle of meal prep excellence. They defy the notion that healthy or prepared food has to be boring. By understanding the mechanics of moisture and the importance of high-quality fats and cheeses, you can create a weekly lunch or dinner that you actually look forward to.
Whether you’re fueling a workout, staying in ketosis, or just looking for a way to make your coworkers jealous of your lunch, these wings are the answer. Put on your apron, grab the Parmesan, and prepare to elevate your meal prep game to a whole new level of savory perfection.